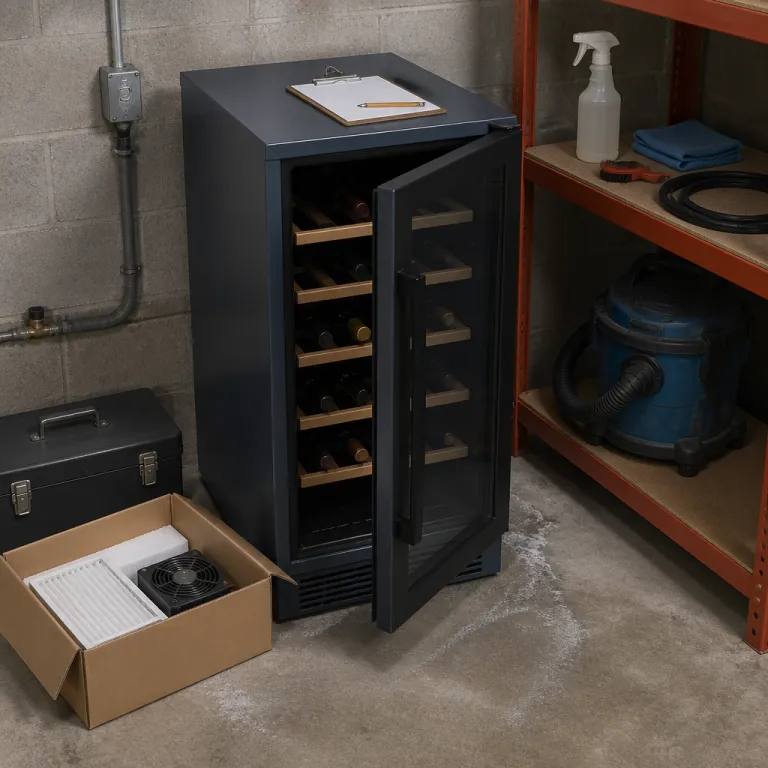
Month 1 – calibration: setting your new wine fridge up for a stable decade
Your first month with a new wine cooler sets the tone for its entire life. Treat this period as a commissioning phase rather than just plugging the appliance in and trusting the factory settings, because the way you handle early wine fridge care will decide whether your bottles age gracefully or cook slowly on the top shelf. A modern wine fridge is a precise cooling system, not a casual kitchen gadget.
Start by verifying temperature accuracy with an independent thermometer placed in the middle rack beside a bottle of wine. Manufacturer specifications for a wine fridge often target plus or minus 1 degree Celsius thermostat accuracy, yet that is a design goal rather than a guarantee for every individual appliance that leaves the line. If your control panel says 12 °C and the thermometer reads 14 °C, your temperature control is already outside the safe range for quality wine storage.
For single zone wine fridges, set the temperature between 11 and 13 °C and let the system stabilize for at least 24 hours. Dual zone wine fridges need a more deliberate approach, with the upper zone around 7 to 9 °C for ready to drink whites and the lower zone around 12 to 14 °C for reds, because this split respects both serving needs and long term wine storage stability. During this time, avoid opening the fridge door repeatedly, as every opening forces the cooling system to work harder and masks true temperature behavior.
Upgrade seekers often underestimate how much the surrounding space shapes performance in the first month. A freestanding wine model pushed tight against a wall or wedged into a narrow storage space will run hotter, cycle more often, and shorten compressor life, especially when dust debris already starts to collect on the rear grille. Leave at least 5 to 10 centimeters of clearance around the cooler so the cooling system can exhaust warm air efficiently.
If you are transitioning from a makeshift wine cellar corner or a basic kitchen fridge, this is also when you benchmark noise and vibration. Listen to the new wine cooler when the compressor starts and stops, then compare it to your old fridge wine solution, because subtle hums now can become intrusive rattles later if routine upkeep is ignored. For readers sensitive to vibration and its impact on sediment, a deeper dive into compressor hum and long term flavor is available in this analysis of vibration and wine aging over months of storage.
Document everything in a simple log during this first month of ownership. Note the ambient room temperature, the set temperature on the control panel, the actual thermometer readings, and how often the cooler cycles, because these data points become your baseline for the month 12 performance audit. This habit also strengthens your position if you ever need to claim a warranty repair for a failing cooling system or a defective temperature sensor.
To make this easier, consider using a reliable digital thermometer such as the ThermoPro TP50 or an equivalent model with at least ±1 °C accuracy and a clear display you can read through the glass door. Recording readings from the same device over time gives you consistent, comparable data instead of scattered notes from different tools.
Finally, register the appliance warranty immediately and read the fine print about appliance repair coverage. Many brands limit coverage if the wine cooler is installed in an unventilated space or used as a general purpose fridge for food instead of a dedicated wine cellar appliance, and ignoring those terms can turn a simple compressor swap into a full price service call. Taking one quiet evening now to understand the warranty will save both money and frustration when the first real problem appears.
Month 3 – door seals, airflow, and the quiet leak that ruins temperature control
By the third month, the new wine cooler feels familiar, which is exactly when most owners stop paying attention. That complacency is why so many wine fridges drift out of spec on temperature and humidity long before the first warranty period ends, even though the fixes are simple and part of smart first year maintenance planning. Your goal in this phase is to hunt down invisible leaks and airflow blockages before they become expensive appliance repair jobs.
Start with the door gasket, because a weak seal turns a carefully tuned wine fridge into a glorified room temperature cabinet. Close the door on a dollar bill at several points around the frame and pull gently, since a firm tug should meet resistance while a loose slide means warm air will infiltrate and force the cooling system to run constantly. When the seal fails this test, you are not just wasting electricity, you are also exposing quality wine to temperature swings that accelerate aging and flatten aromas.
For a clearer view of this test, imagine a simple diagram: the bill is placed halfway across the gasket, the door closes fully, and arrows show the direction of your pull. If the note slips out without resistance at any point along the perimeter, that section of the seal is suspect and deserves closer inspection or adjustment.
Inspect the gasket visually for cracks, hardened sections, or dust debris that prevents full contact. A soft cloth and mild soapy water will usually restore flexibility and grip, but if the rubber has split or warped, schedule a service visit while the warranty still covers parts, because restoring cooling performance later without coverage can be costly. This is also the right time to confirm that the door closes squarely and that the hinges on the cooler wine appliance have not loosened under daily use.
Inside the cabinet, check that bottles are not pressed directly against the rear wall where cold air enters. Blocking those vents in a compact wine cellar style fridge will create hot and cold zones, so the front bottles sit warmer while the back row risks partial freezing, which is disastrous for cork integrity. Leave a few centimeters of space around each vent to let the cooling system breathe, even if that means sacrificing a little storage space in the short term.
Upgrade seekers often push capacity limits, especially when a new shipment arrives and every shelf in the wine cooler looks temptingly empty. Resist the urge to double stack bottles or wedge them sideways, because overloading a wine fridge compresses airflow and undermines the very temperature control you paid for. If you routinely exceed capacity, that is a signal that a second freestanding wine unit or a larger built in wine cellar style appliance will serve you better than constant improvisation.
Month 3 is also a good checkpoint for your own habits around the appliance. If you open the wine fridge repeatedly while cooking, or leave the door ajar while debating which bottle of wine to serve, the compressor will cycle more often and the average temperature will creep upward, especially in smaller fridges. Training yourself to choose quickly and close the door firmly is a low effort form of preventive care that pays off over time.
Finally, think about how you interact with the rest of your wine life around the cooler. If you often improvise when you misplace a corkscrew, learning a few creative ways to open a wine bottle without a traditional opener can prevent you from wrestling bottles in and out of tight shelves and knocking the control panel accidentally. Small behavioral tweaks like these, combined with the dollar bill test and a quick gasket clean, keep your first year routine on track and protect both the appliance and the collection it shelters.
Month 6 – coils, filters, and the midlife check that separates quality wine fridges from future failures
At the six month mark, your new wine cooler has settled into a rhythm, which makes this the ideal moment for deeper maintenance that most owners skip. The difference between a quality wine fridge that runs quietly for a decade and a noisy, short lived appliance often comes down to what you do right now in the middle of the first year. This is where your care routine moves from simple checks to hands on work.
Unplug the fridge before you touch anything behind or beneath it, because safety and warranty protection both depend on treating the appliance like the electrical system it is. Pull the unit gently away from the wall to expose the rear panel or the front kick plate, depending on whether you own a freestanding wine model or a built in design, since different fridges route airflow differently. Your goal is to reach the condenser coils and any intake grilles where dust debris accumulates.
Use a soft brush attachment on a vacuum cleaner to remove lint, pet hair, and general dust from the coils and vents. When these surfaces are clogged, the cooling system must work harder to shed heat, which raises internal temperature, increases energy use, and shortens compressor life, especially in compact wine fridges with small fans. A clean set of coils can drop operating temperature by several degrees and restore stable temperature control without any appliance repair visit.
Premium wine cellar appliances such as the EuroCave La Première S (single temperature, charcoal filter, and hygrometry control as specified in EuroCave’s official product documentation) include charcoal filters that most owners forget to replace. If your wine cooler has a filter slot inside the cabinet, check the manual for the recommended interval and swap in a fresh cartridge now, because stale filters recirculate odors and can subtly taint corks over time. This simple act of care protects both the appliance and the sensory quality of the wine you plan to age.
While the unit is pulled out, inspect the power cord, plug, and surrounding space. Look for kinks in the cable, scorch marks on the outlet, or signs that the fridge has been pressed too tightly against cabinetry, because these are early warnings that the installation will eventually require appliance repair if ignored. If you see anything suspicious, a qualified technician from a reputable customer service network is a better choice than experimenting with do it yourself electrical fixes.
Inside the cabinet, wipe down shelves and interior walls with a soft cloth and a solution of mild detergent and water. Avoid harsh chemicals or scented cleaners, since porous materials in a wine cellar style fridge can absorb odors that migrate slowly into corks and labels, undermining the very idea of a controlled wine storage environment. Take this opportunity to re evaluate how you use storage space, grouping bottles by region or drinking window so you open the door less often and reduce temperature swings.
For readers who care as much about aesthetics as performance, month 6 is also when you notice how the cooler integrates into your broader wine cellar design. If your unit sits among reclaimed wood racks or bronze accents, it is worth reading about which materials age gracefully in wine cellars and which do not, because the surrounding environment affects both humidity and long term durability. Matching a high quality wine fridge to a thoughtful wine cellar space is part of treating the appliance as core infrastructure rather than a disposable gadget.
Month 9 and 12 – humidity, performance audits, and knowing when to call service experts
The last quarter of your first year with a new wine cooler is about verification rather than novelty. By month 9, the question is no longer whether the fridge looks good in your space, but whether it is quietly protecting every bottle of wine as promised, and whether your maintenance routine is actually working. This is where humidity, noise, and energy use tell you the truth that marketing copy never will.
Place a small digital hygrometer inside the wine fridge and leave it for several days without moving it. For cork preservation, the target humidity range inside a wine cellar style appliance is roughly 50 to 80 percent relative humidity, because levels below that dry corks while levels far above encourage mold on labels and racks. If your readings fall outside this band, adjust temperature settings slightly, add a shallow tray of water on a lower shelf, or improve room humidity rather than assuming the cooler is defective.
To keep measurements consistent, use a combined thermometer and hygrometer from a reputable brand, and position it on a middle shelf away from vents and the door. This reduces the impact of short term fluctuations when you open the fridge and gives you a more accurate picture of the long term storage environment your bottles actually experience.
At the same time, listen critically to the cooling system. A compressor that once cycled on and off with a soft hum but now rattles or runs almost constantly is signaling either airflow restriction, a failing fan, or a refrigerant issue that will eventually require appliance repair by qualified service experts. Do not ignore new noises or vibrations, especially if you have already cleaned coils and checked door seals earlier in the year.
Month 12 is your full performance audit, and it should be as methodical as the checks you performed in month 1. Repeat the thermometer test on multiple shelves, compare current readings to your original log, and note any drift in temperature control or uneven zones inside the wine cooler, because these patterns reveal whether the fridge will age gracefully or is an early failure candidate. If you track energy use with a plug in meter, compare the current average to the first month to see whether the system is working harder than before.
Use this audit to decide when to call customer service and when to handle tasks yourself. Cleaning coils, wiping gaskets, and reorganizing storage space are all safe do it yourself steps, while refrigerant leaks, electrical issues, or persistent temperature instability belong firmly in the hands of appliance repair professionals who understand the wine industry’s specific requirements for wine storage equipment. A good rule of thumb is that anything involving sealed system components or wiring should trigger a service call while the warranty is still active.
For upgrade seekers, this is also the moment to compare real world experience with marketing claims and online reviews. If your current wine fridge has struggled to maintain stable conditions despite careful upkeep, you may be better served by a higher quality model with a more robust cooling system, thicker insulation, or a different format such as a larger freestanding wine unit or a dedicated wine cellar cabinet. Use your own data rather than anonymous reviews to judge what “best” means for your collection and your home.
Handled this way, first year wine cooler care becomes less about chores and more about building a relationship with a critical piece of your wine storage infrastructure. You are not just repairing wine equipment when it fails, you are actively extending the life of the fridge, protecting every bottle, and learning how different fridges behave in real homes rather than in lab tests. That knowledge will guide your next purchase far more reliably than any brochure, and it will keep both your appliance and your wine in peak condition for many years.
Key figures on wine coolers, maintenance, and failure risks
- Field data from major appliance service networks suggest that neglected condenser coils can raise compressor operating temperatures by roughly 10 to 15 °C, which significantly increases failure risk within the first five years of a wine fridge’s life (summarized from internal statistics and technician reports shared by large U.S. repair chains such as Mr. Appliance and Sears Home Services; figures are indicative rather than laboratory certified).
- Energy Star analyses of residential refrigeration equipment indicate that dirty coils and poor ventilation can increase energy consumption by about 10 to 30 percent, meaning a poorly maintained wine cooler may cost substantially more to run than its rated figures suggest (see U.S. EPA Energy Star technical documentation for household refrigeration, especially the “Refrigerator and Freezer Product Specification” and related service bulletins for these approximate ranges).
- Industry surveys of premium wine storage owners report that units with documented annual maintenance, including seal checks and coil cleaning, experience roughly 30 to 40 percent fewer temperature related service calls compared with similar fridges that receive no routine care (compiled from aggregated service reports and customer questionnaires collected by European and U.S. wine storage specialists between 2018 and 2023; percentages are approximate and may vary by brand and usage).
One-page troubleshooting checklist for first-year wine cooler maintenance
- Temperature drift in the first month: Verify with an independent thermometer on the middle shelf, allow 24 hours for stabilization, and adjust the set point in small increments until readings match your target range.
- Uneven cooling or frozen bottles: Move bottles away from rear vents, avoid double stacking, and confirm there is at least 5 to 10 centimeters of clearance around the cabinet for proper ventilation.
- Door constantly cycling the compressor: Perform the dollar bill test around the gasket, clean the seal with mild soapy water, and make sure the door closes squarely without racks or bottles obstructing it.
- Excessive noise or new rattles: Check that the fridge is level, remove any items touching the interior walls, clean condenser coils, and if noise persists or worsens, schedule a visit from a qualified appliance repair technician.
- Humidity outside the 50–80% band: Confirm hygrometer placement away from vents, adjust cabinet temperature slightly, add a shallow tray of water for dry conditions, or improve room humidity if levels are consistently low.
- Odors or stale air inside the cabinet: Replace any charcoal or air filters according to the manufacturer’s schedule, wipe interior surfaces with a mild detergent solution, and avoid scented cleaners that can affect corks.
- When to call service experts: Contact customer service promptly for refrigerant leaks, electrical smells, scorch marks, persistent temperature instability, or any issue involving sealed system components or wiring, especially while the warranty is active.