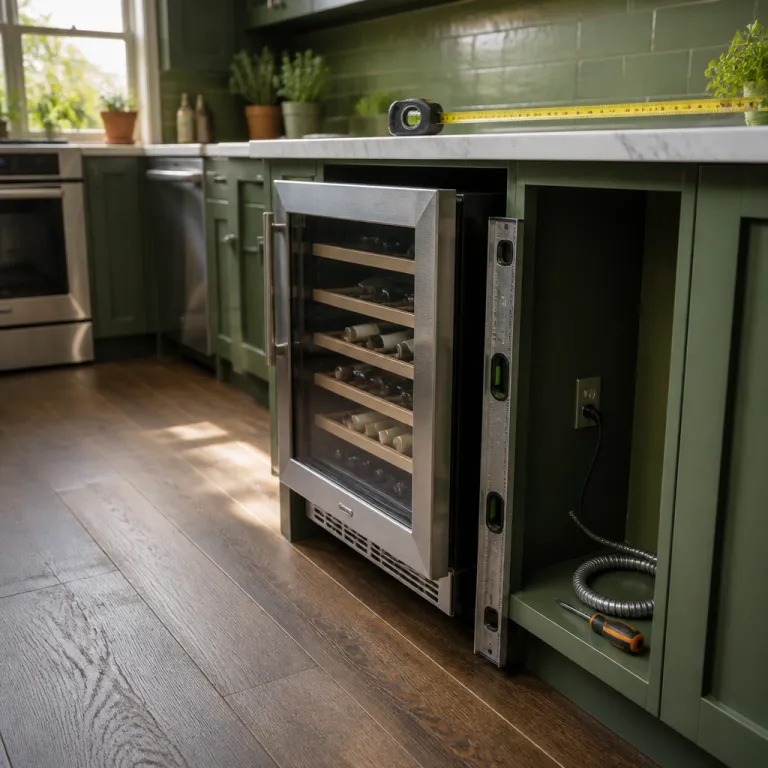
Planning a wine cooler kitchen island installation before the cabinetry is built
Most problems with a wine cooler kitchen island installation start on paper, not on site. When you plan the wine cooler and kitchen island together, you can align the fridge opening, cabinetry layout, and electrical work before anyone cuts wood. That early coordination protects your wine collection and avoids expensive rework once the unit is already in place.
Begin by deciding whether the island wine feature is a visual focal point or a discreet appliance hidden in the kitchen cabinetry. A visible wine fridge in the bar area or on the fridge island face calls for a model with a finished front, matching toe kick, and lighting that flatters both the bottles and the surrounding space. A more integrated wine approach, where the cooler blends with fridge kitchen panels and drawers, usually means choosing a built wine model designed for flush installation with minimal gaps.
Next, map the exact location of the wine cooler within the island space, relative to sinks, dishwashers, and any cooking zone. You should ensure that the cooler island cutout leaves enough inches on all sides for proper ventilation, even when the doors of neighboring units swing open. A clear plan for wine storage zones, including where you will keep small wine formats and where you will stage glasses, keeps the kitchen workflow smooth.
Think in three dimensions rather than just reading capacity numbers on wine coolers and wine fridges. The Wine Enthusiast Classic 70 measures about 104 x 60 x 64 centimeters, while the GE 31 bottle wine fridge is roughly 84 x 48 x 56 centimeters, and those dimensions interact differently with standard island depth and countertop height. Matching the unit height to your finished counter level avoids awkward toe kicks, while checking door swing against adjacent fridges and units prevents collisions.
For a serious wine cellar builder, the choice between a single zone wine fridge and a dual zone wine cooler should come before you finalize the island framing. A single zone unit suits a focused red wine collection, while a dual zone model supports both white wine and sparkling wine at lower temperature settings in a separate zone wine compartment. If you expect your wine collection to grow, leaving space for two units or for taller coolers can be smarter than overfilling one small wine cabinet from the start.
Choosing between built in and freestanding wine units inside an island
The most critical decision in a wine cooler kitchen island installation is whether you use a true built in unit or try to tuck a freestanding wine fridge into the cabinetry. A built model is engineered to vent from the front, so it can live inside tight cabinetry without cooking its own compressor. A freestanding unit is designed for open air around the sides and back, and sliding it into an island space almost always leads to overheating.
Look closely at the product specifications for any wine cooler you consider for a kitchen island, because the ventilation diagram tells you more than the bottle count. A proper built wine unit will show front ventilation and specify minimum clearances in millimeters or inches at the sides, rear, and top. If the manual calls the model freestanding, it belongs in open bar area layouts or against a wall, not buried in cabinetry beside other fridges and units.
For a fully integrated wine look, consider an under counter model tested for flush installation, such as a 60 centimeter integrated wine cooler with dual temperature zone shelves. A dual zone wine fridge of this type can hold both serving ready whites and longer term wine storage for reds, while its front venting design protects the cooling system inside the island. Matching the door finish to the surrounding kitchen cabinetry keeps the island wine feature from visually breaking the counter run.
Some homeowners hope that leaving a few extra inches behind a freestanding wine fridge will be enough, but the physics of heat rejection say otherwise. When a freestanding wine unit pushes warm air out the back into a closed cavity, that hot air recirculates and raises the ambient temperature around the compressor. Over time, the cooler works harder, runs hotter, and risks early failure, especially when the kitchen is already warm from cooking.
If you are unsure whether your preferred wine coolers are truly built in ready, ask your contractor to review the installation diagrams before ordering. A competent installer will confirm that the cooler island opening, toe kick, and grille area match the manufacturer’s ventilation requirements. That small design check can add years to the life of your wine fridge and keep your wine collection at a stable temperature.
Clearances, heat sources, and ventilation paths around the island wine fridge
Once you have chosen a built in wine cooler, the next challenge in a wine cooler kitchen island installation is managing heat and airflow. Every compressor based wine fridge pulls room air across a condenser coil and then expels warmer air, which must escape the cabinetry. If that warm air is trapped, the internal temperature of the unit drifts upward and the wine storage environment becomes unstable.
Start by respecting the minimum clearances in the manual, usually a few centimeters at the sides and rear, and a specific grille opening at the front. Even with a front venting wine cooler, you should avoid sealing the toe kick completely, because the unit still needs a path for cooler air to enter and for warm air to leave. When the cabinetry design includes decorative panels, your kitchen designer should coordinate cutouts that align with the cooler’s ventilation zone.
Heat from neighboring appliances is the second major threat to a stable wine cellar environment inside an island. Placing a wine fridge directly beside a dishwasher or oven concentrates heat in one cabinetry bay, forcing the cooler to run longer cycles to maintain its set temperature. If the layout allows, keep at least one cabinet or drawer unit between the cooler island opening and any high heat appliance.
Think about the overall kitchen airflow as well, especially in compact spaces where multiple fridges and coolers share the same wall. An island wine unit that faces a busy bar area will see frequent door openings, which briefly raise the internal temperature and add moisture. Choosing a dual zone wine fridge with slightly cooler settings in the lower zone can buffer those swings for delicate whites and sparkling bottles.
Noise is the final comfort factor that many homeowners underestimate when placing wine fridges in social spaces. Because the island often anchors seating and conversation, a wine cooler that operates below roughly 40 decibels is worth the extra cost in this location. When you compare units, listen for compressor hum, fan noise, and vibration, because those small sounds become more noticeable when people gather around the kitchen island.
Dimensions, power supply, and when a DIY install is realistic
Dimensions on the spec sheet can look abstract until you compare them to your actual kitchen island frame. A tall wine cooler like the Wine Enthusiast Classic 70, at roughly 104 centimeters high, will not fit under a standard counter without modifying the base cabinetry. A shorter under counter wine fridge closer to 84 centimeters high aligns more naturally with typical counter heights and toe kicks.
Measure the rough opening in three directions, then compare it to the overall dimensions of your chosen wine coolers, including the door thickness and handle projection. You should ensure that the door can swing fully without hitting adjacent units, and that the hinge side has enough space to clear neighboring cabinetry. Remember that a fridge island often sits near seating, so a door that opens into a walkway can become a daily annoyance.
Electrical planning is just as important as physical fit for any wine cooler kitchen island installation. A dedicated circuit for the wine fridge reduces the risk of nuisance breaker trips when other kitchen appliances start up, especially in a busy bar area. The outlet should sit in an accessible part of the island space, high enough to avoid water and low enough that the cooler’s cord does not pinch against the back panel.
Routing the power cord cleanly behind the unit, without tight bends, helps protect the insulation and keeps the cooler island cavity tidy. If your design includes multiple units, such as two single zone wine fridges side by side, confirm that the combined electrical load still fits within the circuit rating. For complex layouts or when adding a new circuit, involving a licensed electrician is safer than attempting a DIY solution.
A competent DIYer can often slide a replacement wine fridge into an existing opening, provided the cabinetry, ventilation, and power supply are already correct. Creating a new integrated wine opening in a finished kitchen island, by contrast, usually calls for a contractor who can adjust structural supports and finishes. When in doubt, treat the island wine feature like any other built in appliance and budget for professional installation.
Designing zones for everyday use, long term storage, and future flexibility
Beyond the mechanics of a wine cooler kitchen island installation, the most satisfying projects think carefully about how the space will be used over time. A kitchen island can support both immediate serving needs and longer term wine storage, but only if the zones are planned deliberately. That means deciding which bottles live in the island wine fridge and which move to a separate wine cellar or larger storage room.
For everyday drinking, a dual zone wine fridge in the island lets you keep reds at around 14 to 16 degrees Celsius and whites closer to 8 to 10 degrees. The upper zone wine compartment often works well for ready to pour bottles, while the lower zone can hold backup stock and sparkling wine. If you prefer a focused red wine collection, a single zone unit in the island paired with a larger remote wine cellar can be a better balance.
Think about how the island connects to the rest of the kitchen and bar area, including glassware, decanters, and serving tools. Drawers beside the cooler island opening can hold corkscrews and stoppers, while overhead shelves or nearby cabinetry can display stemware. Keeping these elements close to the wine fridge turns the kitchen island into a functional tasting station rather than just another appliance bay.
Future flexibility matters as your wine collection evolves, especially if you start with a small wine selection and plan to grow. Leaving a little extra width in the cabinetry or designing two narrower openings instead of one wide one allows you to swap single zone units for dual zone coolers later. Planning for standard 60 centimeter or similar widths also makes it easier to replace a wine fridge when models change.
Finally, remember that a wine cooler is only one part of a broader wine storage strategy that may include a dedicated wine cellar, under stair racks, or other fridges. The island wine unit should handle bottles you reach for weekly, while more sensitive or long aging wines rest in a quieter, darker zone elsewhere. When those roles are clear, every part of your kitchen and storage plan works together to protect the wine and enhance daily life.
FAQ
How much clearance does a wine cooler need inside a kitchen island
Most built in wine coolers need only a few centimeters of clearance at the sides and rear, but they require a fully open front vent area. You should follow the manufacturer’s diagram, which usually specifies exact millimeters or inches for safe airflow. Never reduce the front grille opening with decorative panels, because that is the primary path for warm air to escape.
Can I install a freestanding wine fridge inside my island cabinetry
Freestanding wine fridges are designed to sit in open air, with warm exhaust air leaving the back and sides. When you enclose a freestanding unit in island cabinetry, that hot air recirculates and raises the ambient temperature around the compressor. Over time, the cooler runs hotter, becomes less efficient, and may fail prematurely, so a true built in model is strongly recommended.
Where should the electrical outlet go for an island wine cooler
The safest location for an island wine cooler outlet is on the interior wall of the cabinet bay, slightly above the floor and away from potential water sources. This placement keeps the plug accessible while allowing the unit to slide back without crushing the cord. A dedicated circuit is ideal, especially in kitchens where many appliances start simultaneously.
How close can a wine cooler be to a dishwasher or oven
It is best to keep at least one full cabinet or drawer unit between a wine cooler and any high heat appliance such as a dishwasher or oven. That buffer reduces the amount of radiant and convective heat reaching the cooler’s cabinetry bay. With less external heat, the wine fridge can maintain a stable internal temperature and run shorter cooling cycles.
Is a dual zone wine fridge worth it for an island installation
A dual zone wine fridge is often worthwhile in a kitchen island because it supports both serving temperature whites and cellar temperature reds in one footprint. The upper zone can hold bottles you plan to open soon, while the lower zone maintains a slightly cooler environment for backup stock. If you mainly drink one style of wine, a single zone unit may be simpler, but many homeowners appreciate the flexibility of two independent zones.